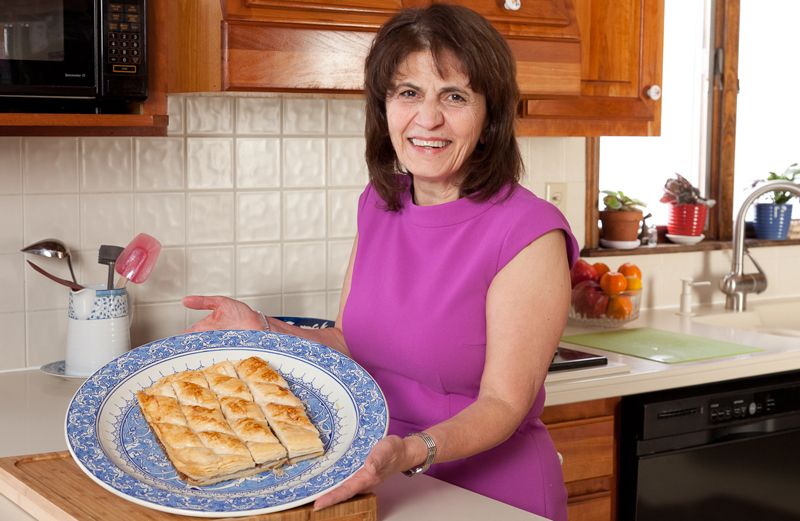
[MUSIC PLAYING] Hello, everyone. Welcome to my kitchen. My name is Nursel, and I’m in New City, New York. Today I’m going to show you the most famous and also very traditional Turkish dessert called baklava. So let’s start.
In literally every kitchen, you can find all these ingredients except the phyllo dough. You can find it in any supermarket around you. So before we do anything, turn your oven on to 400 degrees.
Over here, we’re going to do the baklava. And also at the same time, I’m going to make syrup to go on the top of the baklava to make it sweet. You need lemon juice, or it could be bottled or fresh. Just two, three tablespoons.
One tablespoon of cinnamon. We have one and 1/2 cup of chopped walnuts. One cup of sugar for the syrup, and another 1/2 cup of sugar to add to the walnuts. And I have the water for the syrup, and then we have the butter.
And now I’m going to melt the butter. You can use microwave or you can do it on the top of the stove. Probably two minutes will be just fine.
I have an aluminum foil you can certainly use. While the butter is melting, let’s start with the syrup. Take out two quarts of the– you all have it in the kitchen. Add a cup of water, one cup of sugar, and few drops of fresh lemon juice. Use your hand.
And then that’s it. Put it on the stove. Turn it on high. When it start boiling, what you do is reduce it. Let it simmer. And you have to reduce it to half.
Let’s start with our baklava. We’ll take the melted butter from the microwave. It’s ready. And I need my pastry brush.
But meanwhile, while that one is resting there, let’s chop our walnuts. You can use any food processor. I usually use a little one, because I don’t need much. Add a little sugar. And you can add the cinnamon too.
[WHIRRING]
Turn it on. See how fast we got it? Our stuffing is ready now.
Now I’m going to take the phyllo dough. It’s been sitting in the room temperature for a couple hours. I leave it usually in the refrigerator, but about an hour before you start, you can leave it into room temperature. It works out much better. And how you can tell that is fresh? It’s not sticking.
So you can use it both ways. I can cut it in half. Use half of it for the bottom, and the other half for the top. I’m just going to take my scissors. Much easier this way.
Start brushing the pan– the sides, the bottom. Make sure you cover every surface. And then that’s it. Then you start putting one layer at a time. Quickly brush it. Continue.
And we’re going to use all this big pile. One for the bottom. And no cheating. Every layer has to be brushed.
[MUSIC PLAYING]
I have the walnut mixtures right on the top of the phyllo dough. And then I’m going to spread it evenly, and it has the cinnamon and the sugar, and it tastes really yummy. You’re going to love this baklava.
All right. I’m going to continue doing the same thing, over and over. And then when we finish, I’m going to show you how we’re going to cut it into diamond shapes. And believe it or not, there word diamond means– in Turkish, means baklava.
[MUSIC PLAYING]
Now look how fast we came to the end. I’m putting the last layer. Wow. I also run out of water, which is perfect. I told you you will have enough. You make sure the top layer is totally covered. Because then if you don’t do that, it will really dry out.
So this is how it should look. Nothing is plain. But now I’m going to cut it into a diamond shape. So first, we’re going to go straight lines– about little less than two inches. And don’t be afraid. Your knife should be really nice and sharp.
And I’m just going to make straight lines. And then when I come around to cut it the other way– and then we’re going to see the diamond shape. All right. So now that is done this way, now I’m going to go on an angle– 45.
OK. You can see it’s already shaping up. I start getting my diamonds. So now that I did that, if you look at the bottom, you probably see a couple cuts from the knife, because this is aluminum foil. Now, if you put this one in the oven, you’re going to see your butter is going to make a lot– it’s going to drip.
So to eliminate that, very easy. Take a piece of aluminum foil. Put your tray right in the middle. And fold over the sides. Make it like a pocket. I covered it totally, so now it’s ready to go to the oven.
Now while this one is baking in the oven for about 20, 25 minutes, it should be golden brown. Don’t burn it too much. And don’t take it out. It should really look like French fries.
This is how it should look like. Look at the color. Look how puffy it is. All the layers you can see. Look how pretty it looks. Don’t you want to eat it? But I’m not done with it.
You remember the syrup we prepared? You can tell it’s reduced to a cup. Because I put a cup of sugar and a cup of water, it should be two cups. But now it is reduced. If it is too thick, you can always add some water to it and let it cook a little.
Now, the trick also– either your baklava or your syrup– one of them has to be hot, one has to be cold. If they are both cold, the syrup will not sink into the baklava. And if that doesn’t happen, it’s not going to look good. It’s going to be really soggy. And if it is both hot, again, the layers will stick to each other. It’s not going to be good.
So this one is still boiling. Cover every single piece. Don’t leave anything without the syrup. And trust me, you have enough. Mm. Already I can’t wait to eat it.
I’m covering every one. And you can see the syrup is not staying on the top. It’s sinking all the way to the bottom. And look how shiny it looks. Like bad enough, it was so good to eat. And now it’s shiny. You can’t wait.
Now, you can just start eating it right now. Take a piece and eat it. But I like it better when it sits in the refrigerator a little. See, it still got a little warm from the hot syrup. It tastes better if you put it in the refrigerator for maybe about an hour, until it’s really cold. And then you can just cut it and eat it.
Look at the layers. You can see them. Look how flaky it is. Look– it’s dripping with all this sweet syrup. I can see it. Mm, this is so good. I’m going to take a piece.
[CRUNCHES]
Mm. Can you hear the layers? The crunch is absolutely delicious.
Now that I finished my first piece, it was so good, so delicious, I want to eat this whole tray. But I shouldn’t do that. So I hope you enjoyed baking with me today. And as they would say in Turkish, [SPEAKING TURKISH]. Means bon appetit. Thank you.
[MUSIC PLAYING]
